
LEANCLOUD-COUNTER-SECURITY.md 7.6 KB
修复 LeanCloud 统计插件安全漏洞
在配置前,请升级 NexT 至 v6.0.6 以上。
在配置过程中请注意博客配置文件和主题配置文件的区别。
注册 LeanCloud 并创建应用
- 首先,前往 LeanCloud 官网 leancloud.cn 进行注册,并登录。
请注意,目前华东节点和华北节点创建应用需要先在账号设置完成实名认证,并且官方表明“在国内市场将只服务于可验证的商业客户”;美国节点暂无上述要求,并且账号系统与华东节点和华北节点是独立的,如需使用请前往 LeanCloud 国际版官网 leancloud.app 注册登录。
- 然后点击图示
1处,进入控制台:

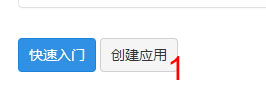
- 接着,点击图示
1处,创建应用:
- 在弹出窗口
1处输入应用名称(可随意输入,可更改,为演示方便取名为test),并选择2处“开发版”,然后点击3处创建:
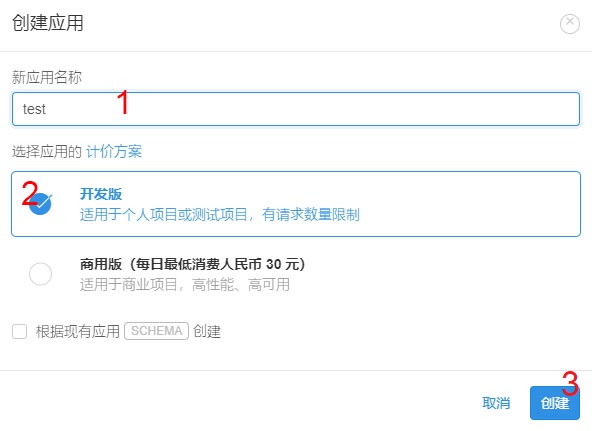
到这里应用创建完成。
建立 Counter 类并在 NexT 中启用插件
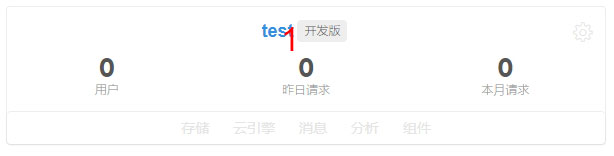
- 点击
1处应用名称进入应用管理界面:
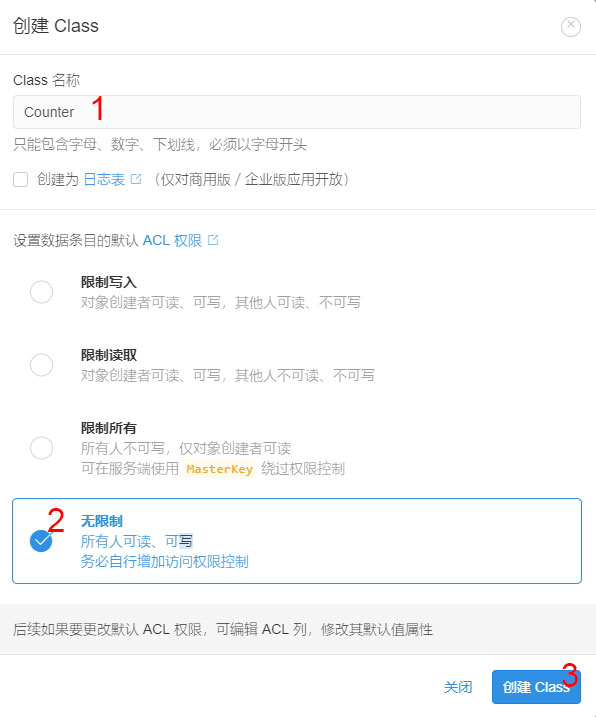
- 如图,点击侧边栏
1处创建 Class:

- 在弹出窗口
1处填入Counter,勾选2处无限制,并点击3处创建 Class:
- 此时类已创建完成。接下来点击图示
1处进入设置,然后点击2处进入应用 Key:
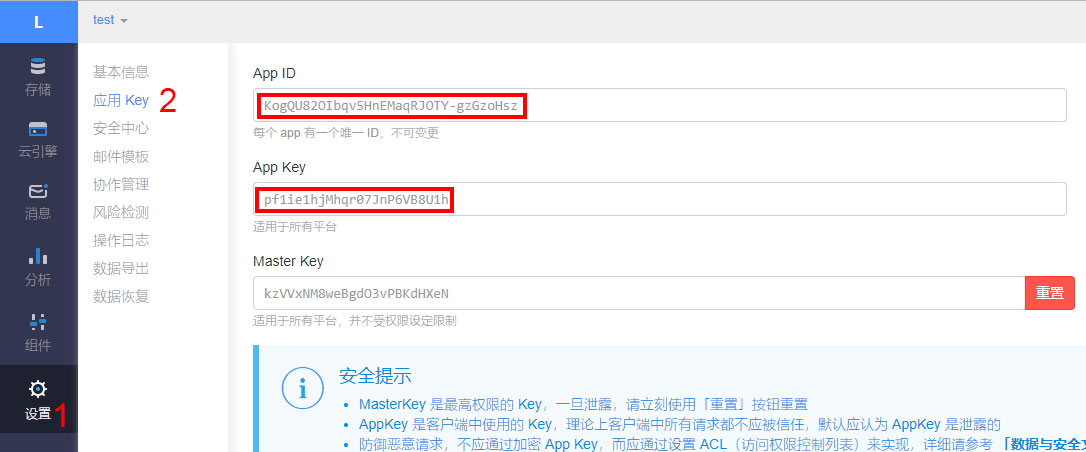
粘贴
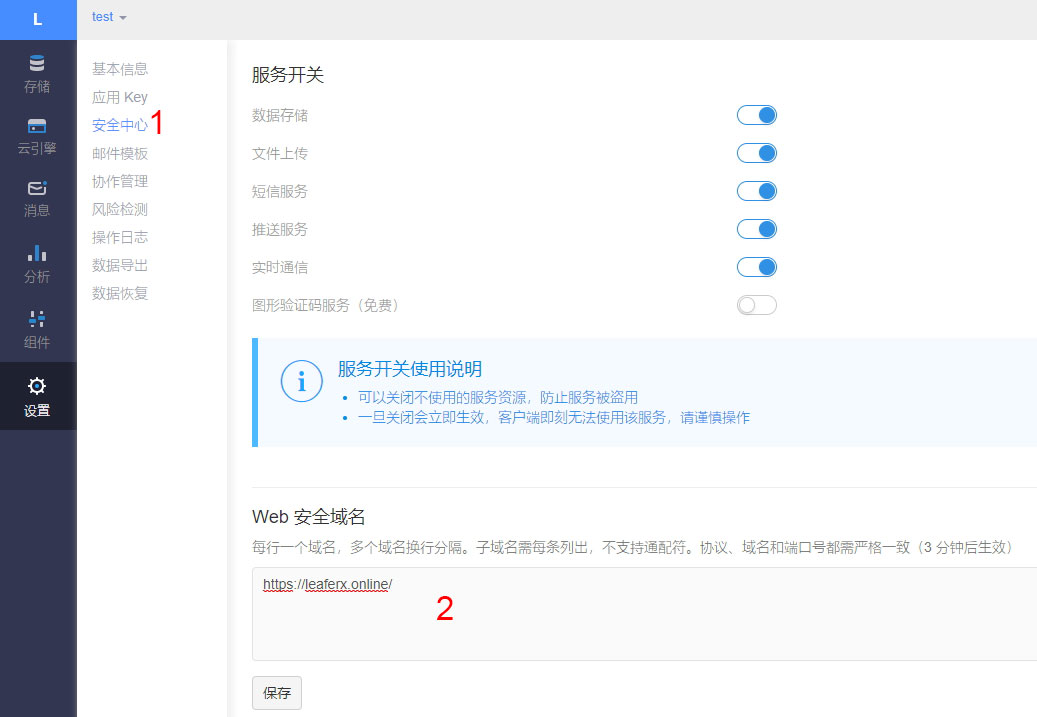
App ID和App Key到 NexT主题配置文件_config.yml对应位置。此时配置文件应如下:leancloud_visitors: enable: true app_id: # <your app id> app_key: # <your app key> # Required for apps from CN region server_url: # <your server url> # Dependencies: https://github.com/theme-next/hexo-leancloud-counter-security security: true- 设置Web安全域名确保域名调用安全。点击
1处进入安全中心,然后在2处填写自己博客对应的域名(注意协议、域名和端口号需严格一致):
到这里内容均与 Doublemine 的为NexT主题添加文章阅读量统计功能这篇文章相同,只不过截图为新版的Leancloud的界面。
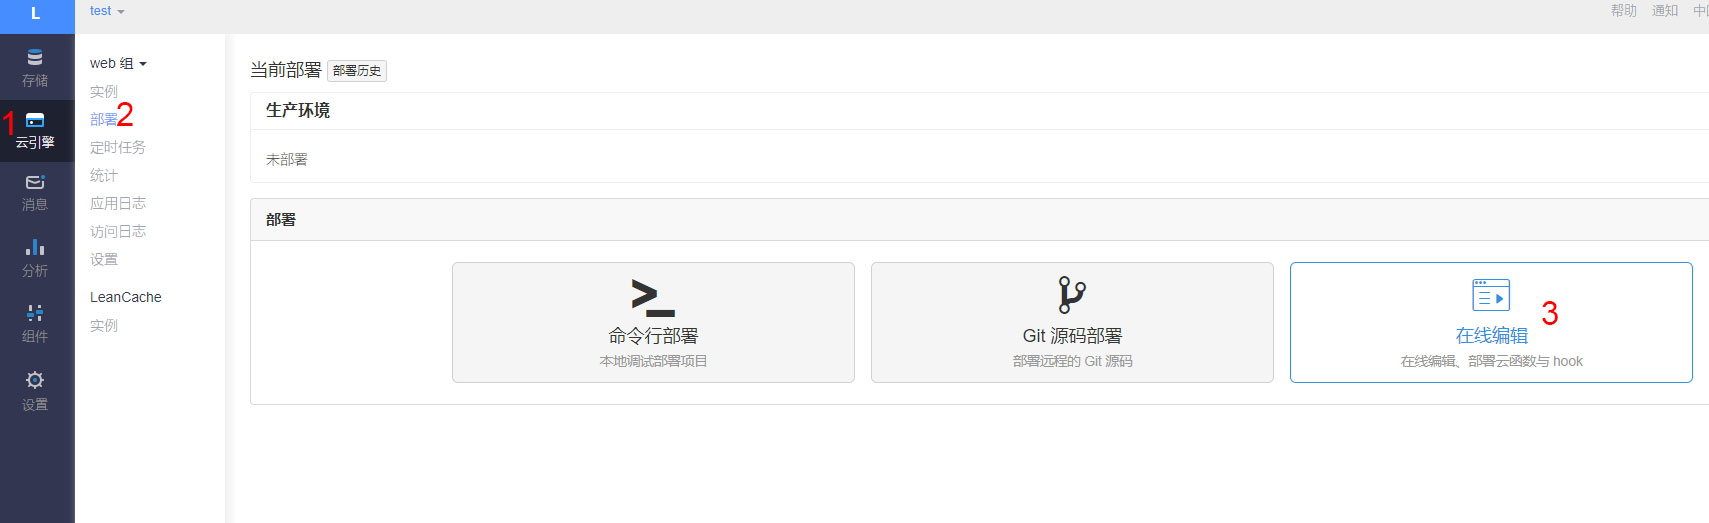
部署云引擎以保证访客数量不被随意篡改
- 点击左侧
1处云引擎,然后点击2处部署,再点击3处在线编辑:
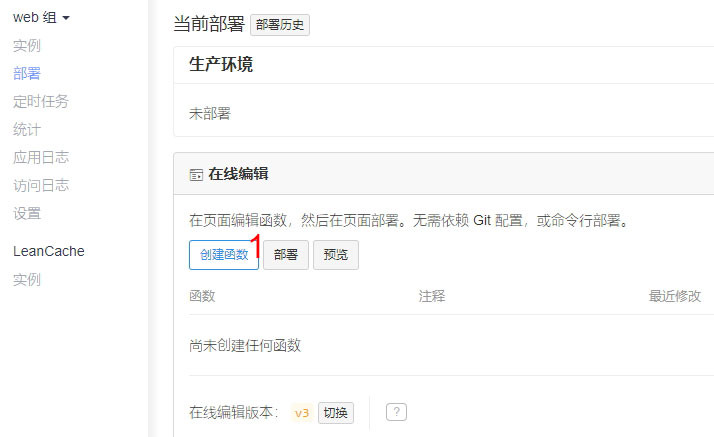
- 点击
1处创建函数:
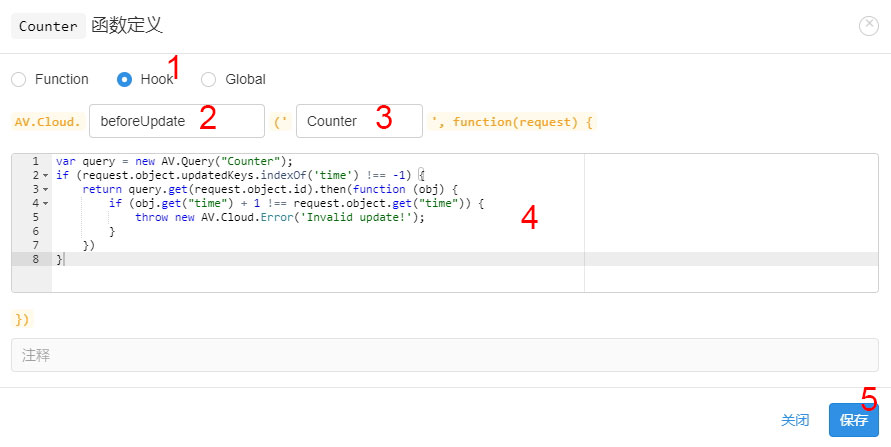
- 在弹出窗口选择
1处Hook类型,然后2处选择beforeUpdate,3处选择刚才建立的Counter类。在4中粘贴下方代码后,点5处保存。javascript var query = new AV.Query("Counter"); if (request.object.updatedKeys.includes('time')) { return query.get(request.object.id).then(function (obj) { if (obj.get("time") > request.object.get("time")) { throw new AV.Cloud.Error('Invalid update!'); } return request.object.save(); }); }
- 设置Web安全域名确保域名调用安全。点击
如图所示:
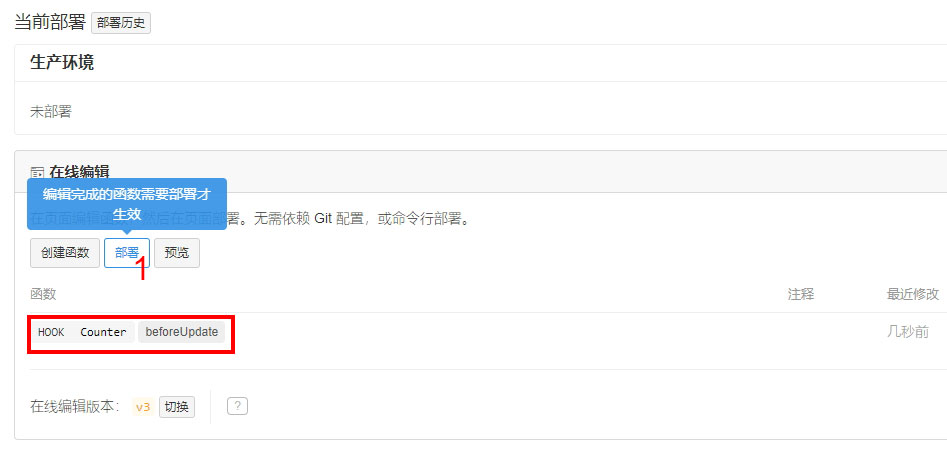
- 点击保存后应出现类似红框处函数。此时点击
1处部署:
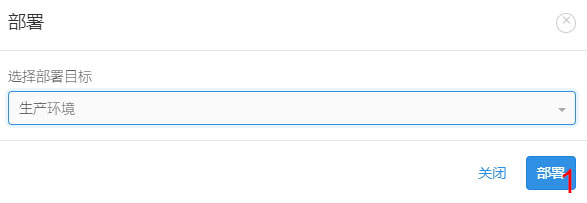
- 在弹出窗口点击
1处部署:
- 等待出现红框处的成功部署信息后,点击
1处关闭:
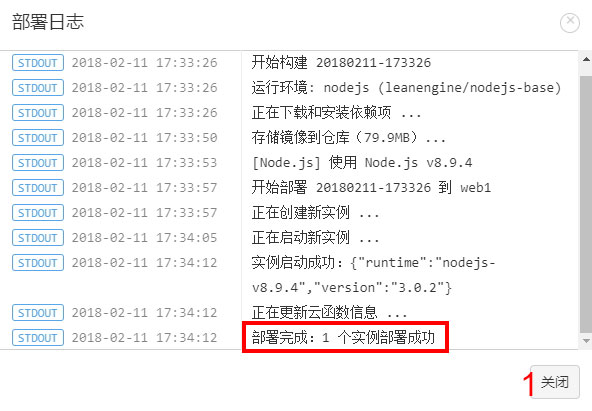
至此云引擎已成功部署,任何非法的访客数量更改请求都将失败。
进一步设置权限
打开NexT主题配置文件
_config.yml,将leancloud_visitors下的security设置为true(如没有则新增):leancloud_visitors: enable: true app_id: # <your app id> app_key: # <your app key> # Required for apps from CN region server_url: # <your server url> # Dependencies: https://github.com/theme-next/hexo-leancloud-counter-security security: true- 打开 cmd 并切换至博客根目录,键入以下命令以安装
hexo-leancloud-counter-security插件: ```
- 打开 cmd 并切换至博客根目录,键入以下命令以安装
npm install hexo-leancloud-counter-security
- 打开**博客配置文件** `_config.yml`,新增以下配置:
  ```yml
  leancloud_counter_security:
    enable_sync: true
    app_id: <your app id>
    app_key: <your app key>
    username:
    password:
在相同目录键入以下命令:
hexo lc-counter register <username> <password>或
hexo lc-counter r <username> <password>
将 <username> 和 <password> 替换为你自己的用户名和密码(不必与 LeanCloud 的账号相同)。此用户名和密码将在 Hexo 部署时使用。
打开博客配置文件
_config.yml,将<username>和<password>替换为你刚刚设置的用户名和密码:leancloud_counter_security: enable_sync: true app_id: <your app id> app_key: <your app key> username: <your username> #如留空则将在部署时询问 password: <your password> #建议留空以保证安全性,如留空则将在部署时询问在博客配置文件
_config.yml的deploy下添加项: ```yml deploy:other deployer
type: leancloud_counter_security_sync ```
返回 LeanCloud 控制台的应用内。依次点击
12,检查_User表中是否出现一条记录(图示以用户名为admin为例):

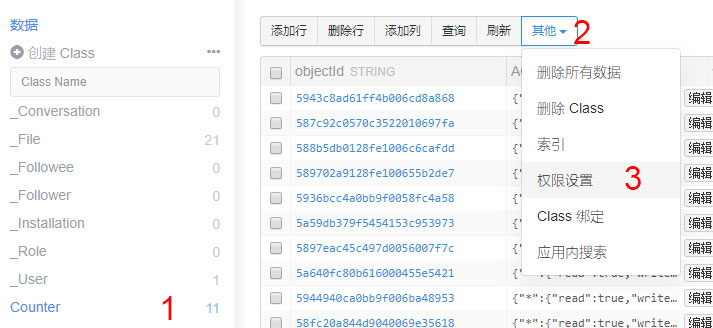
- 点击
1处进入Counter表,依次点击23,打开权限设置:
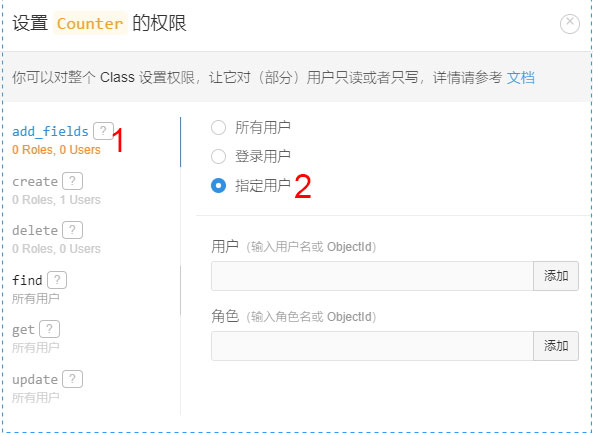
点击此处应与下条1add_field后选择2指定用户, 并将下两栏留空:create设置相同(选择你所创建的用户):
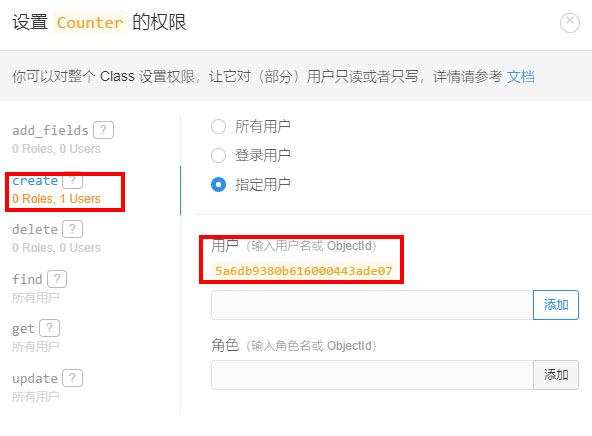
- 点击
1create后选择2指定用户, 在3处键入用户名,点击4处后点击5处添加:

完成此步操作后,界面应与图示类似:
- 点击
1delete后选择2指定用户, 并将下两栏留空:
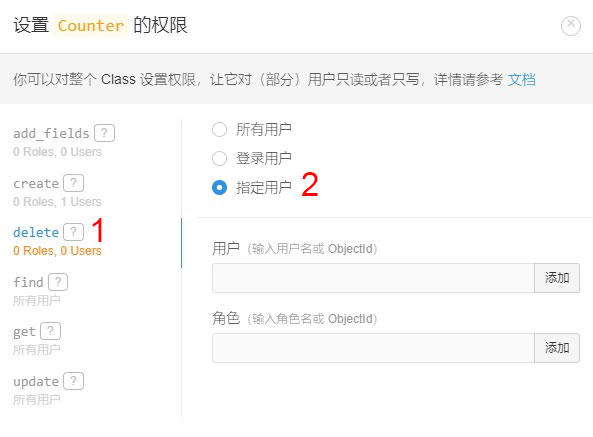
至此权限已设置完成,数据库记录只能在本地增删。
每次运行 hexo d 部署的时候,插件都会扫描本地 source/_posts 下的文章并与数据库对比,然后在数据库创建没有录入数据库的文章记录。
如果在博客配置文件中留空 username 或 password ,则在部署过程中程序会要求输入。